About our Resin Art Class!
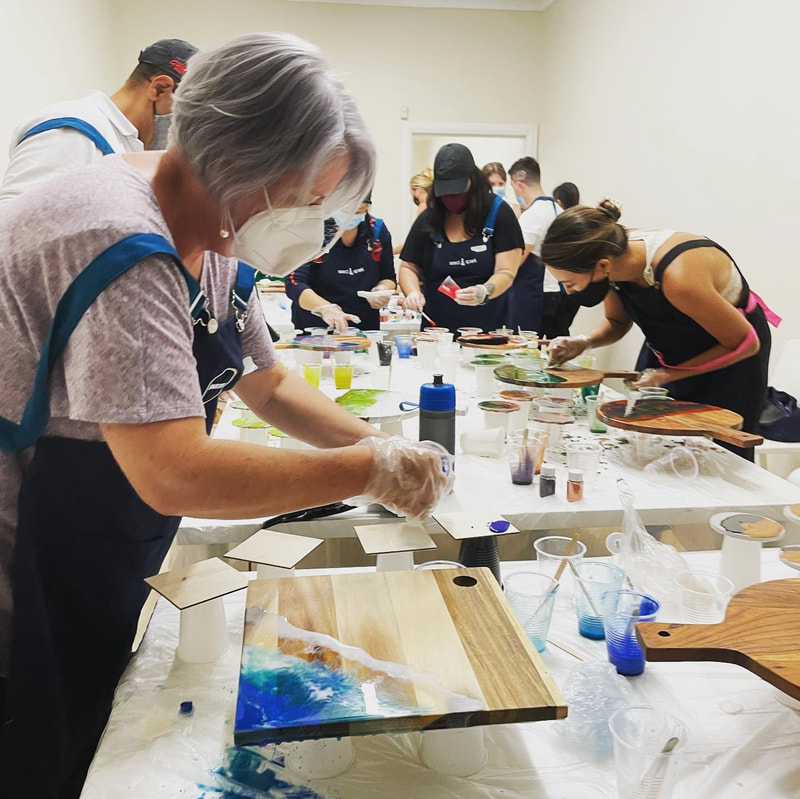
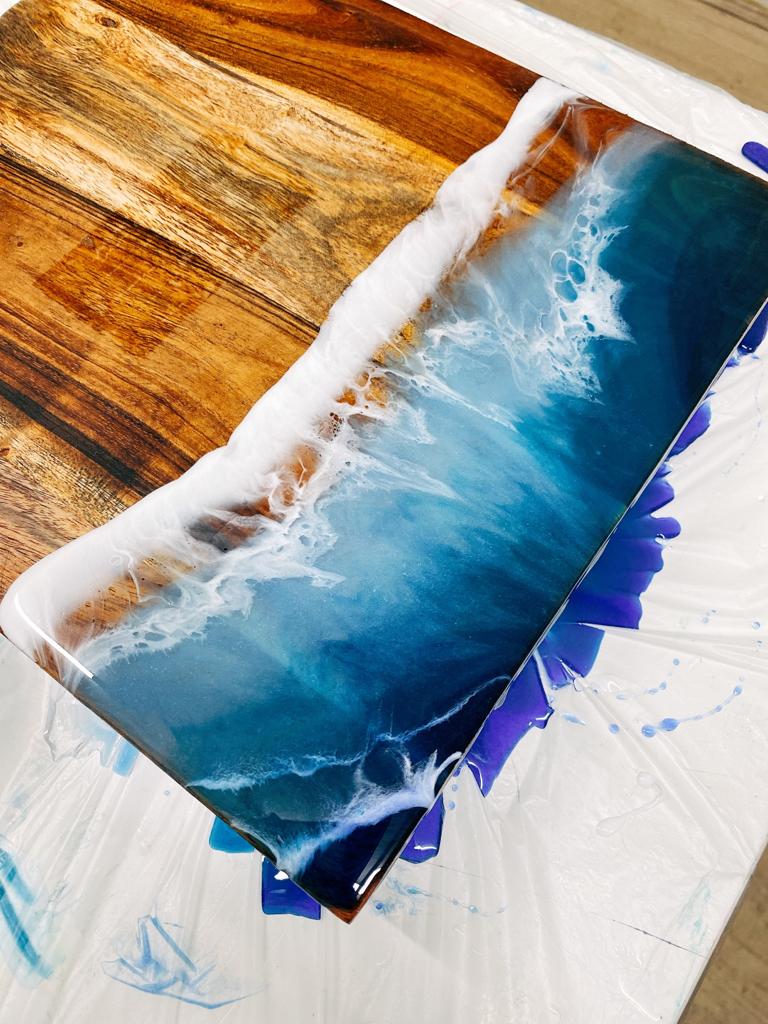
Your instructor will do a hands-on demonstration of how to create the iconic Ocean/Beach theme board using the direct pour technique during the class, so you can see step by step how it all comes together. Your instructor may also demonstrate the dirty pour technique.
The resin we use is Art Resin which is the highest quality, non-toxic, no VOC and most importantly food grade, which means it'll be ready to use for all your dinner parties.
At the end of this interactive beginners resin workshop, you will have a cheeseboard and four coasters plus the confidence to continue exploring your creativity with resin!
Things To Note:
Resin Art Class Optional Add-ons
1. Resin Trinket Tray ($30)
A resin trinket tray is a made from pouring resin into an oval or seashell shaped dish mould. It then cures into little a trinket tray/trinket dish handy for keeping your jewellery, coin, keys, small office items all in one place.
2. Take-Home Pack 480mls Epoxy Resin ($45)
Resin take-home pack consist of Resin and hardener which you can buy and recreate your own resin creations in the comfort of your own home. It's quite popular for people to do the class and then make more for gifts.
Resin Art Class Knowledge Level
Our workshop is beginner-friendly and prior resin knowledge or experience is not necessary! In our class you will be taught all about resin and a step-by-step demonstration will be done to show you how to create your own resin cheese board and coasters. You'll then be able to have a go yourself and our instructors will be walking around the class, able to help you with colours and guide you as much or as little as you want when you are creating your board.
Resin Art Class Provided Supplies
This unique form of art offers endless possibilities, with a wide range of colours and materials that can be used to create stunning and unique pieces. Whether you're an experienced artist or just looking to try something new, our resin workshops are perfect for anyone who wants to let their creativity flow.
So why wait? Sign up for our weekly RESIN workshops today and start creating beautiful works of art.
Our experienced instructors will guide you every step of the way and you'll be amazed at the beautiful pieces you'll be able to create.
Get ready to unleash your inner artist, get some me-time or boost your team morale!
Your instructor will do a hands-on demonstration of how to create the iconic Ocean/Beach theme board using the direct pour technique during the class, so you can see step by step how it all comes together. Your instructor may also demonstrate the dirty pour technique.
The resin we use is Art Resin which is the highest quality, non-toxic, no VOC and most importantly food grade, which means it'll be ready to use for all your dinner parties.
At the end of this interactive beginners resin workshop, you will have a cheeseboard and four coasters plus the confidence to continue exploring your creativity with resin!
Things To Note:
- An array of colors will be available for you to choose from on the day.
- This class is suited to those aged 16 and above (under 16's need to be accompanied by a paying adult and discussed with the teacher prior to class), and not suitable if you are pregnant. No experience is necessary, all levels are welcome.
- Pieces require a minimum of 12 hours to set/cure so they will need to be picked up from the venue the following day or within two weeks. Postage of boards after class is available for $20.
- Boards are subject to availability and may be different from photos but there will be a good selection for you to choose from.
Resin Art Class Optional Add-ons
1. Resin Trinket Tray ($30)
A resin trinket tray is a made from pouring resin into an oval or seashell shaped dish mould. It then cures into little a trinket tray/trinket dish handy for keeping your jewellery, coin, keys, small office items all in one place.
2. Take-Home Pack 480mls Epoxy Resin ($45)
Resin take-home pack consist of Resin and hardener which you can buy and recreate your own resin creations in the comfort of your own home. It's quite popular for people to do the class and then make more for gifts.
Resin Art Class Knowledge Level
Our workshop is beginner-friendly and prior resin knowledge or experience is not necessary! In our class you will be taught all about resin and a step-by-step demonstration will be done to show you how to create your own resin cheese board and coasters. You'll then be able to have a go yourself and our instructors will be walking around the class, able to help you with colours and guide you as much or as little as you want when you are creating your board.
Resin Art Class Provided Supplies
- One wooden cheese board (a variety of acacia wood boards are available to select on the day).
- Four wooden coasters.
- A wide variety of resin pigments/acrylic paint, mico pigments, gold flakes and glitter are available.
- Two-part Epoxy Resin (Art Resin brand).
- Mixing cups.
- Mixing sticks.
- Nitrile gloves
This unique form of art offers endless possibilities, with a wide range of colours and materials that can be used to create stunning and unique pieces. Whether you're an experienced artist or just looking to try something new, our resin workshops are perfect for anyone who wants to let their creativity flow.
So why wait? Sign up for our weekly RESIN workshops today and start creating beautiful works of art.
Our experienced instructors will guide you every step of the way and you'll be amazed at the beautiful pieces you'll be able to create.
Get ready to unleash your inner artist, get some me-time or boost your team morale!
What is Resin Art?
Resin art is creating art with epoxy resin. Epoxy resin is a versatile liquid material that can be coloured with pigments then poured onto a surface such as wooden cheese boards or coasters, it can also be poured into silicone moulds to create a wide variety of items.
Our resin cheeseboard and coaster workshop are super fun and interactive. During the class an experienced instructor will teach you how to prep your cheeseboard and coasters. They then show you how to mix the epoxy resin, add the colour pigments, and decorate your cheese boards and coasters with both the direct pour and dirty pour techniques. The class is easy to follow with clear, simple, step-by-step demonstrations, perfect for those just beginning or looking to experiment further!
Resin Art Workshop Focus Areas
In our workshop we use Art resin which is Non-Toxic. They have had their product evaluated by the American Society for Testing and Materials; ArtResin conforms to ASTM D4236: Safe for Home Use.
Regardless, in its liquid form it is still a chemical. You need to protect your hands from epoxy resin and hardener liquids. To do this you can wear nitrile gloves to protect your hands, which are provided in our classes.
How to Prep Your Board and Coasters With Painter's Tape
Before you begin, you will need to prepare your cheese board and coasters with painters tape, masking tape, resin tape or even liquid latex by taping or painting on the latex on the underside. This is because when you pour resin, it would self level and flow over the edges and collect in little droplets on the underside. Once cured you can remove the tape or liquid latex which should give you a clean underside.
How to Mix, Colour and Pour Resin Onto Your Wooden Pieces
Art resin will always come in two bottles, one containing the resin and the other containing the hardener. Art resin is a 1:1 ratio epoxy resin by volume so you will need to pour out equal amounts of each the resin and the hardener and then mix the two for approximately 3 minutes.
Once you have mixed and divided the resin into separate cups, you can colour it using resin pigments, acrylic paint, resin dyes or mica. This is the final step before pouring!
Tips and Tricks to Create Ceiling and Lacing
We have tried so many techniques and products to try to achieve cells which are such a desirable characteristic of fluid artists. After many failed attempts we have found four key things that encourages cells
Resin art is creating art with epoxy resin. Epoxy resin is a versatile liquid material that can be coloured with pigments then poured onto a surface such as wooden cheese boards or coasters, it can also be poured into silicone moulds to create a wide variety of items.
Our resin cheeseboard and coaster workshop are super fun and interactive. During the class an experienced instructor will teach you how to prep your cheeseboard and coasters. They then show you how to mix the epoxy resin, add the colour pigments, and decorate your cheese boards and coasters with both the direct pour and dirty pour techniques. The class is easy to follow with clear, simple, step-by-step demonstrations, perfect for those just beginning or looking to experiment further!
Resin Art Workshop Focus Areas
- Basics of Epoxy Resin & Resin Safety
- How to Prep Your Board and Coasters With Painter's Tape
- How to Mix, Colour and Pour Resin Onto Your Wooden Pieces
- Tips and Tricks to Create Ceiling and Lacing
In our workshop we use Art resin which is Non-Toxic. They have had their product evaluated by the American Society for Testing and Materials; ArtResin conforms to ASTM D4236: Safe for Home Use.
Regardless, in its liquid form it is still a chemical. You need to protect your hands from epoxy resin and hardener liquids. To do this you can wear nitrile gloves to protect your hands, which are provided in our classes.
How to Prep Your Board and Coasters With Painter's Tape
Before you begin, you will need to prepare your cheese board and coasters with painters tape, masking tape, resin tape or even liquid latex by taping or painting on the latex on the underside. This is because when you pour resin, it would self level and flow over the edges and collect in little droplets on the underside. Once cured you can remove the tape or liquid latex which should give you a clean underside.
How to Mix, Colour and Pour Resin Onto Your Wooden Pieces
Art resin will always come in two bottles, one containing the resin and the other containing the hardener. Art resin is a 1:1 ratio epoxy resin by volume so you will need to pour out equal amounts of each the resin and the hardener and then mix the two for approximately 3 minutes.
Once you have mixed and divided the resin into separate cups, you can colour it using resin pigments, acrylic paint, resin dyes or mica. This is the final step before pouring!
Tips and Tricks to Create Ceiling and Lacing
We have tried so many techniques and products to try to achieve cells which are such a desirable characteristic of fluid artists. After many failed attempts we have found four key things that encourages cells
- A good quality resin.
- The density levels of pigments.
- The duration since the resin was mixed
- Applying heat from a heat gun or blow torch.
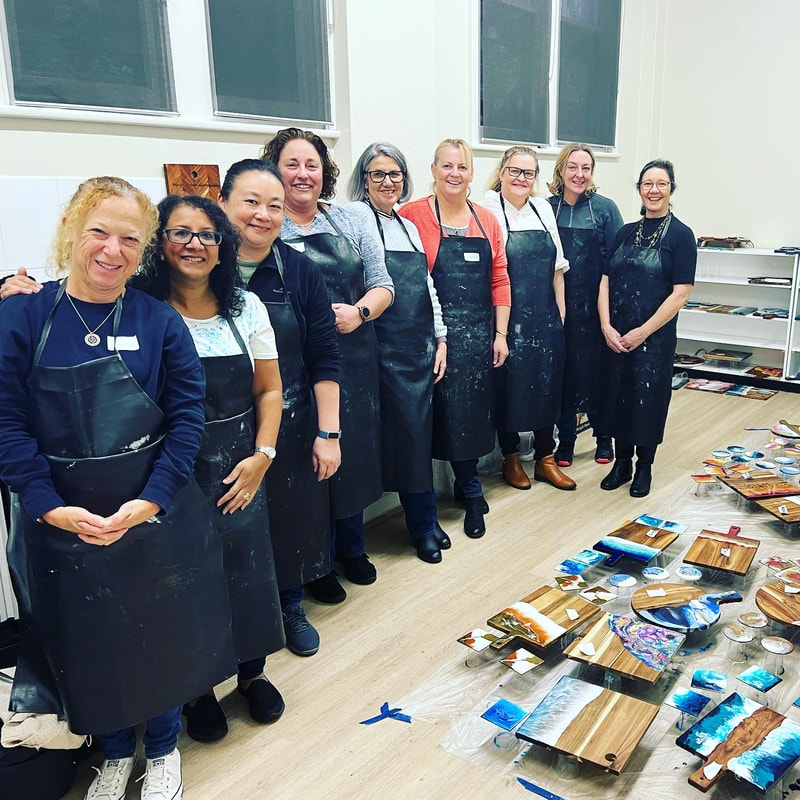
Resin Art Class: Previous Workshop Photos


